Monday, March 31, 2014

Cold Porcelain: Trials and tribulations....


I first got inspired with Cold  Porcelain Clay after seeing Miniature food Art by very talented people out there! I mean look at it, isn't it totally adorbs?

Little Bread and Pastries goodies....
 
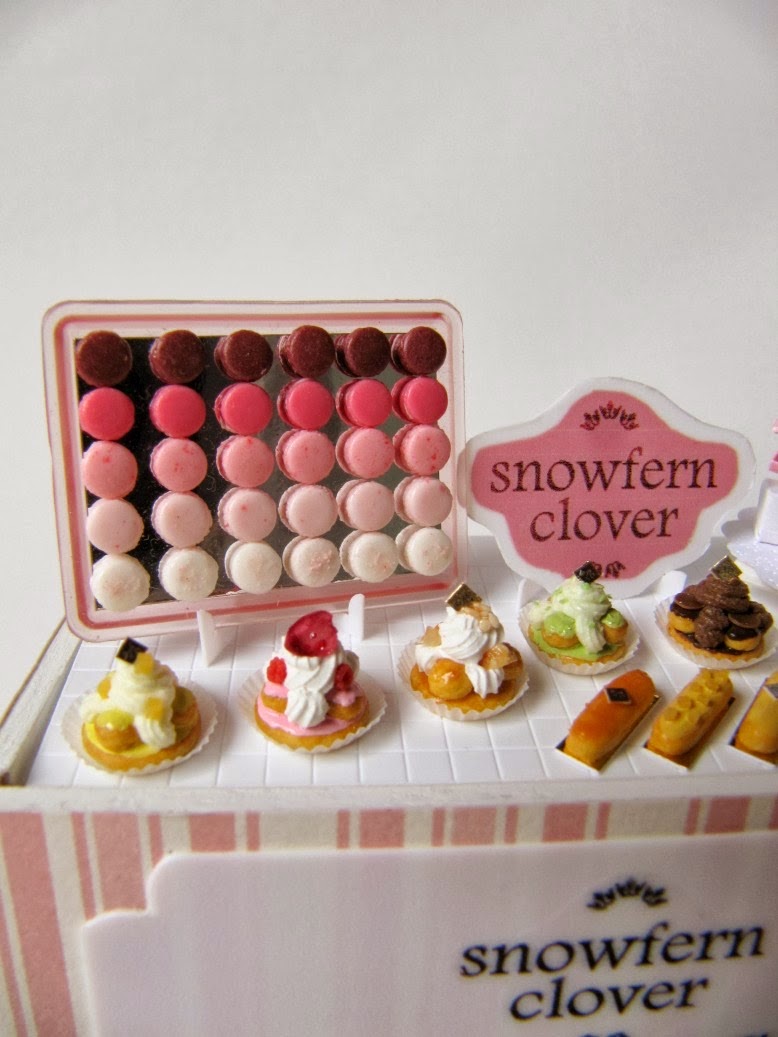
Like Erhmehgerd!.........
 
There are also crazy things like Re-ment, produced by a Japanese company that makes kinda realistic Miniature food and accessories! They get snapped up very quickly and you have to pre-order them!

 
Ok, you can see why I get excited over this now right? Hehe...
 
Few weeks ago I thought ok let's try to make some Cold Porcelain at home. Ingredients are simple and you might already have all this at home...
 
1 cup Cornstarch preferably or cornflour
1 cup PVA glue
1 big spoon distilled vinegar
1 big spoon Baby oil, olive oil or mineral oil
Lotion on standby
 
All the websites online really made it sound easy, there were only about 2 or 3 sites that were honest and said its not easy to make! You either undercook or over cook and the whole blob becomes useless. You can cook it over your stove or microwave.
 
Two disastrous batches later, I think I finally got the third batch about right! I recommend watching videos on Youtube to see the consistency when it's just cooked to get a better idea. There will be try and errors but here are some important steps:
 
1- Mix all the ingredients in a pan not used for consumption. PVA glue goes in first, followed by vinegar & Oil, then add cornstarch little by little and stir until nicely mixed.
 
Stove method:
Heat stove at low heat, keep mixing for like 30secs to 1 minute then remove from heat. If it's still watery put it back on the stove for another 30secs. Once its done the lump wont stick to the pot. Take out and start kneading until smooth!
 
Microwave method:
Mix everything together in microwave-safe bowl, make sure no lumps. Put in microwave for 15secs, take out and mix thoroughly. Repeat again for 15secs or until mixture forms a small ball.
 
Do wrap your porcelain clay in cling film or zip lock bag and put it in a  jar. I have tried first 2 batches with lime juice as some recipes suggest lemon or lime juice as preservatives but sadly, mine has turned like this in 5 days.


The lotion is actually to spread your work surface when you knead the clay ball. It will be quite sticky, I actually did panic a little, don't worry dust your hands with cornflour and it will get smoother and easier to handle. Also spread the lotion on the cling film before you wrap so it doesnt stick on the cling film! Leave it fo rest for 24 hours before working with it.
To check if your Cold Porcelain turned out ok, pinch apart a section and the ends should be tear shaped.


Third batch *fingers crossed*  

Saturday, March 29, 2014

Warm Retro colour-combo?


So... what do you guys think?
 
I have gone a little stir crazy buying beads and walking the streets of Jalan Sultan, flitting from store to store getting ideas....
 
Talk about ideas.... my head hurts and at times it goes into overdrive like a hyper Hamster running on a wheel when I get ideas I have to quickly sketch or write it down! Then I will try and think of how to 'build' the prototype and get frustrated when I hit a brickwall with the technical aspect. The only handy work experience I got was the 1 year learning 'Kemahiran Hidup' in Form 3 doing soldering and wood work. I am still trying to find a sort of Vocational School and take some Courses on Basic Electric wiring, Woodwork and things like that. Friends did suggest things like Professional Papers etc, but end of the day I know I don't want to be working in a Corporate Office so I want to learn things I am interested in and will come in handy!
 
I'm sure i had been a Carpenter at least once in one of my past lives.... hehe.
 
Just a tip to share, don't be shy to get your materials from a Charity Shop or Flea market! Not only are you contributing for a good cause, you are indirectly recycling and giving
the pre-loved item a new lease of life! I bought some tops which were filled with sequins, I thought "heck, thats a lot of sequins in there!", brought it home and I sat on my little station and stripped all the little fellas out and ended up with a compartment full of beads!
I had no idea and had never strung beads before, so it was a lot of trial and error. Once, I strung and strung and strung for 2 hours and wasn't happy with what I saw, I cut the whole thing apart and started all over again. I had coffee with an Old friend yesterday and shared my experience and was glad that Ms.T said "There is no right or wrong way to string beads. Do as you like! "
 
I'm not stringing beads for fashion jewellery or any of that sort! Haha! I know no one would buy my Jewellery creations! Hopefully the idea turns out well and I can show you the prototype soon!


KUMIK head, Obitsu Body arrived but hang on a minute!


I had stumbled upon the world of BJD (Ball-joint dolls) some time ago...
After much surfing until my eyes turned sore, I realized ain't no way I could afford one from companies like Dolfie or Iplehouse & etc where the price for an average doll is about RM 3,000, so I did found the cheaper option that many Forums recommend getting a beginner's doll - Obitsu Body. They usually come headless and you can attach any head from other companies that you want.

.... and I did find another company that produces realistic heads resembling famous Celebrities and they are always Sold Out and you have to pre-order! I contacted a company in Singapore and got mine in couple of week's time.


Goo Hara of KARA ....


 I always thought Tae-Yeon of SNSD is ridiculously cute!


My wrongly ordered KUMIK head... haiiizz....


Freakishly expensive but adorable Byul, Dal & Pullip Yeolume Dolls from Korea..... soon, soon... Let me close a few more deals and I will treat myself to a Doll....

For some reason I can't find the pic of my Obitsu body so I borrowed this one from another Blog... The wonders of the current Toy-making Industry! The company, Obitsu makes them in various sizes, 12cm, 27cm, 45cm and even large 60cm doll bodies!


So the problem I have been facing is attaching the neck peg onto this Obitsu body, there are only a few tutorials online and it does require some sawing and elbow grease.
 
Still, hoping to get a free day this week to get cracking.... Have a good weekend folks!


No rest for the wicked.....

I do apologize for the long absence....
 
Rollercoaster is putting it mildly of what has happened in the past few months. I quit my job as I was left with no choice but to leave. I decided the BS isn't going to end and I can no longer work carrying out stupid tasks from 'Bullies'. As scary as it looked, I decided to grit my teeth and take the road less travelled. It has been just a week since my release and I couldn't be happier and waking up in the mornings has been filled with gladness in heart.
 
 
I haven't given up at all on my crazy ideas for the Doll Lifestyle Project and during this whole week since my Freedom days started,  I've even put up my Idea Board on one of those free nights, organized my little Workstation (my current dining table, which means more TV dinners! Yay!), picked up some new skills over Youtube, sketched my prototype ideas, sourcing for materials, attended an E-commerce class and meeting clients in between. It's a bit crazy ....


Starting anew is always difficult/terrifying; but once you do, be brave and the Universe opens up endless opportunities for you.
 
More exciting updates coming!!